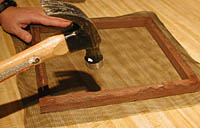
Step 10
- Carefully hammer down the staples until they are flush with the
wood frame.
|
|
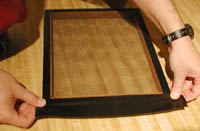
Step 11
- Apply a strip of duct tape over the staples and screen. Trim the
excess to the edge of the frame. Do not wrap the excess tape
around the frame, because it will become clogged with paper pulp.
The tape is also more likely to ware and fray if wrapped around
the wooden frame.
|
|
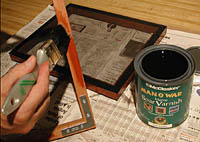
Step 12
- Apply two to three coats of marine spar varnish to the frame
(allow manufacturer's suggested dry times between coats). Take
care not to get any on the open screen area. It will block the
holes. If some varnish gets on the screen, dab it with a rag to
remove the excess. Marine spar varnish is important because of the
time the mold and deckle spend in water.
|
|
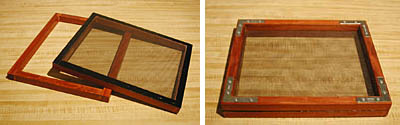
Finished
- The completed mold and deckle are ready to be used.
|
|
|
Variations
for Making a Mold and Deckle
- Picture Frames can be purchased and used to replace steps 1 and
2. Just be sure to purchase two frames that are the same exact
size and shape. The wooden sides need to have a square profile.
The rest of the steps remain the same.
- Embroidery Hoops can also be used to make a mold and deckle. The
screen is held within one set of hoops to make the mold. Another
hoop is then used to make the deckle. The shape of the paper
becomes an interesting round shape using these molds and deckles.
|
